Navigating the interface
The dashboard
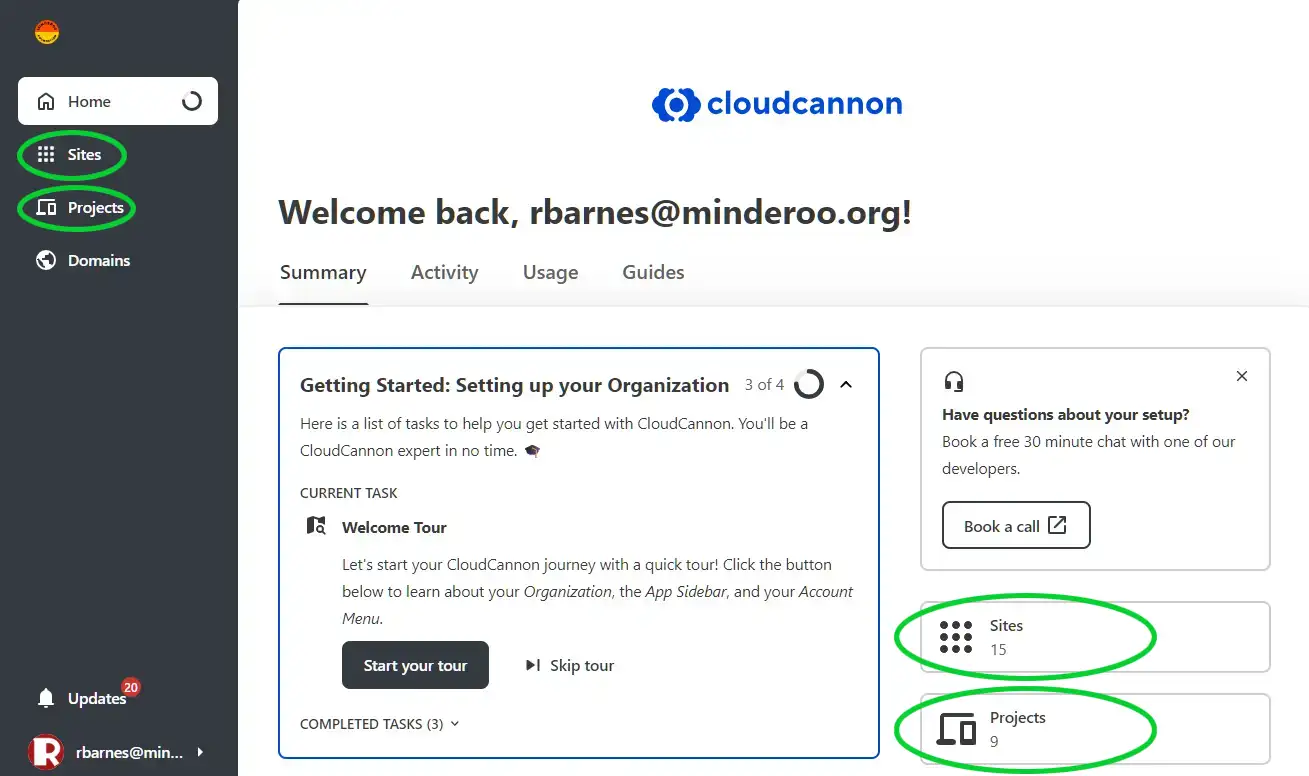
Section titled “The dashboard”The dashboard looks like below, and is the default landing page for CloudCannon.
From the dashboard you can navigate to Projects or Sites from the left hand menu, or the widgets on the right of the dashboard’s main pane, as indicated.
Projects
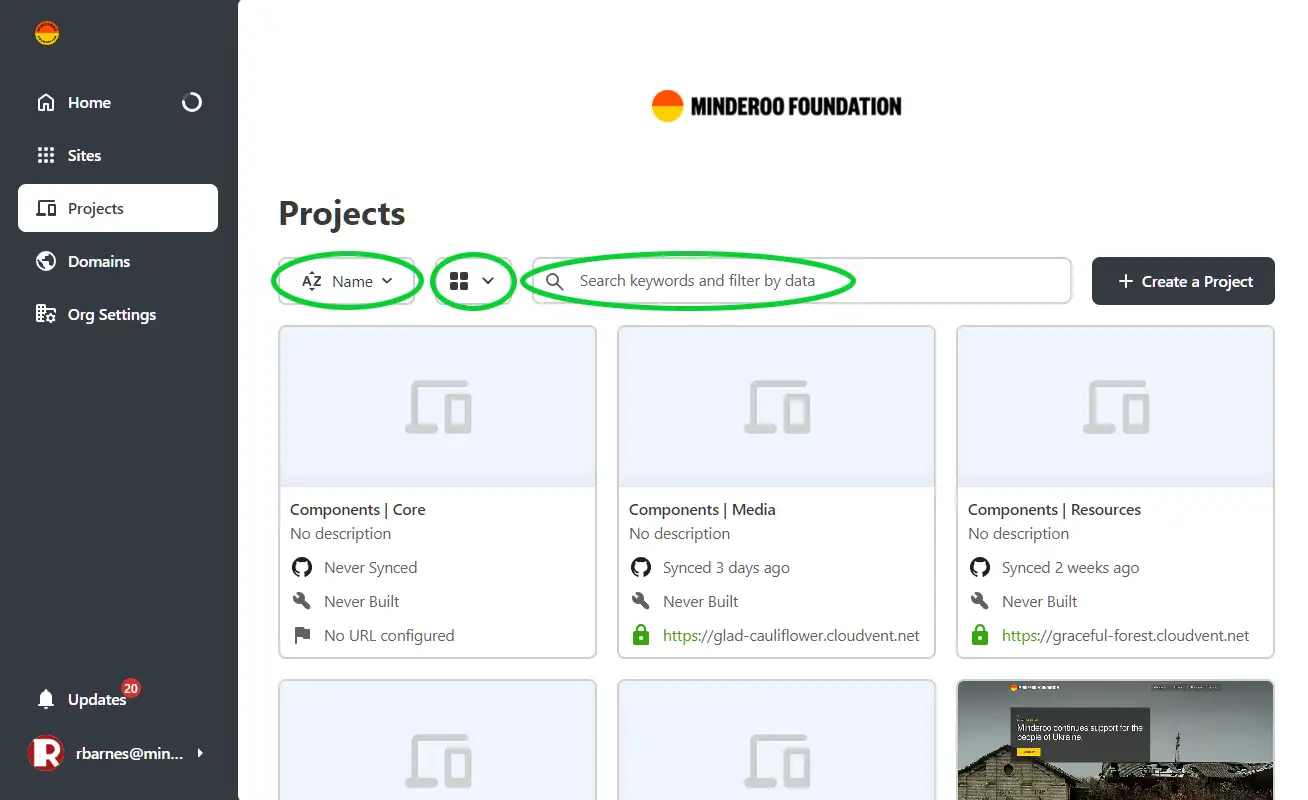
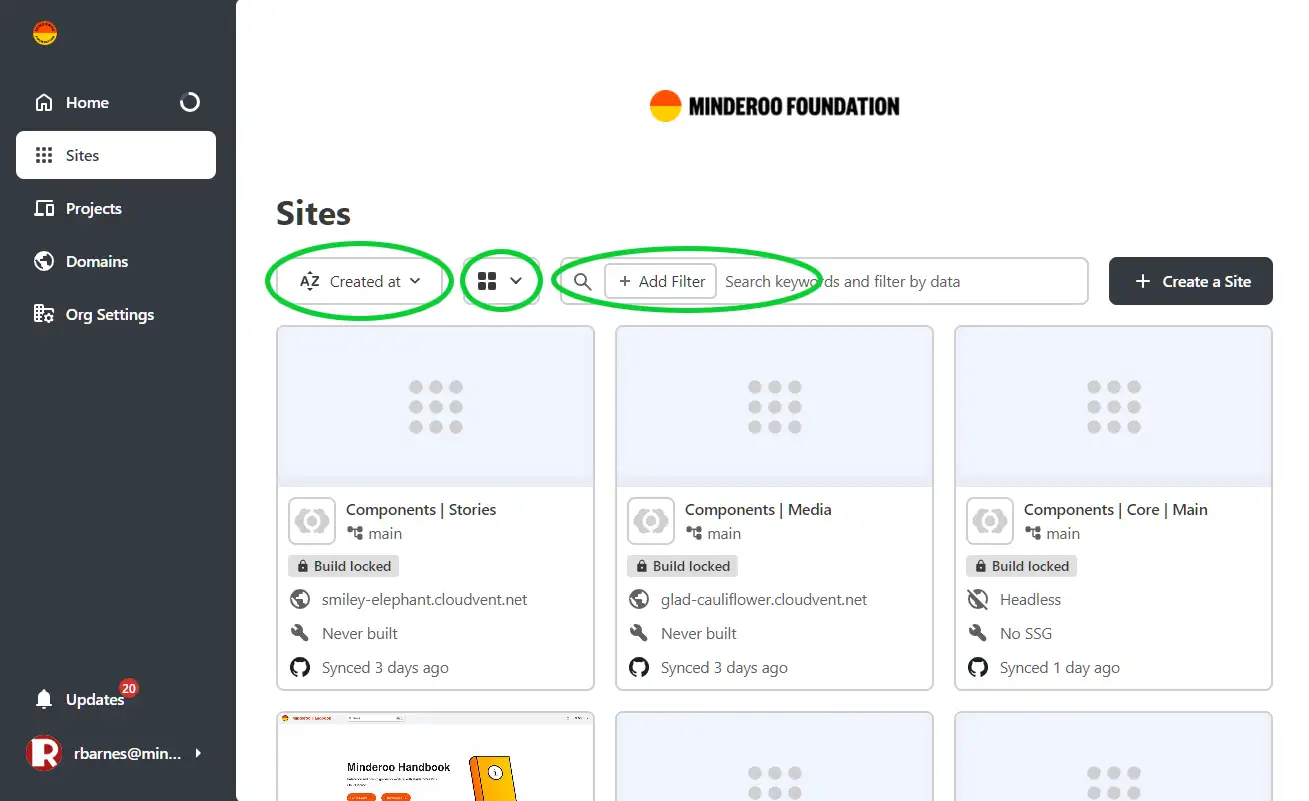
Section titled “Projects”The project page has a list of all the projects that you have access to. A project is a single website, and contains all the branches for that website.
You can sort, change the view of the projects, and search for a specific project in the areas indicated.
Single project
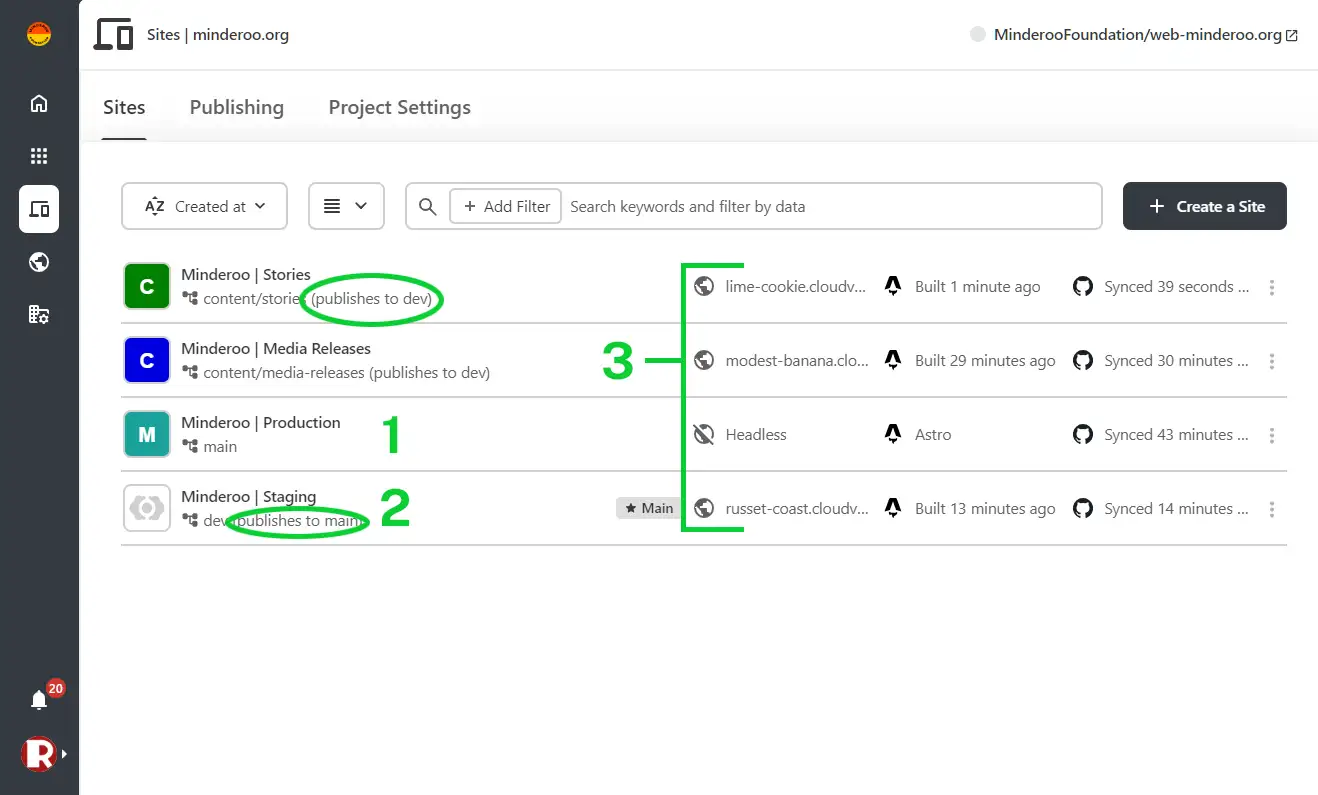
Section titled “Single project”When you click on a project, it shows you a list of all the sites (branches) that belong to that project. Every project has a Production (1 on the diagram) and a Staging (2) site. The Production site can only be published to through CloudCannon, it cannot be edited. In CloudCannon, the Staging site is our main site for editing.
You will see that all other branches publish to Staging, while Staging publishes to Production, as indicated below.
Each site that can be edited in CloudCannon has its own preview website (3) that will show exactly how your changes will appear once published.
This page has a list of all of the sites (branches) that you have access to edit, across all websites. You will see there are multiple copies of each website.
As with the projects, you can sort, change the view of the sites, and search for a specific site in the areas indicated.
Single site
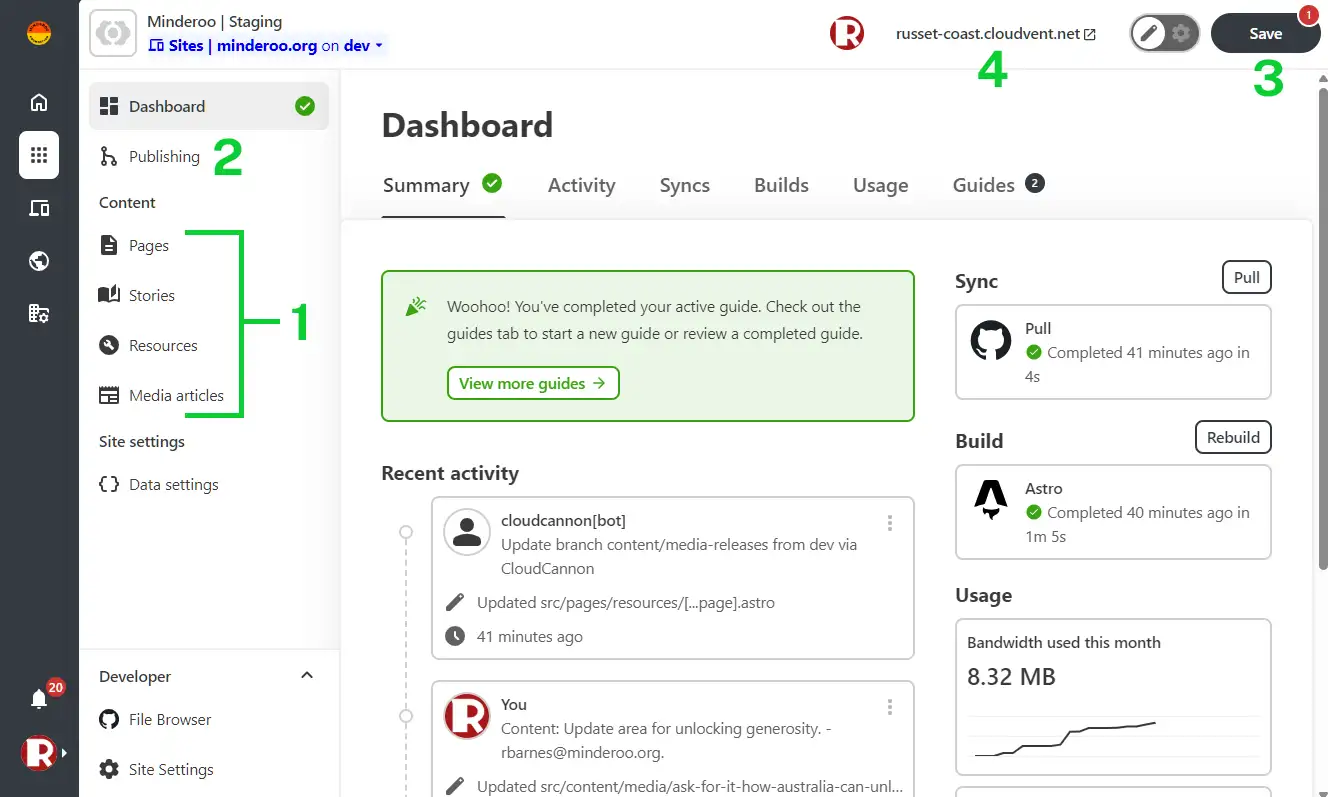
Section titled “Single site”When you navigate to a site, you will end up on that site’s dashboard.
You will see a new left-hand menu, that has a list of the content types (1) for that site. You may not see all of these options, depending on the site and your user level.
The Publishing page can also be reached through this menu (2).
At top left, the Save button (3) shows a notification of how many unsaved changes there are on the site. If there are no unsaved changes, the button is greyed out.
The preview website for this site (4) can be clicked on to launch the preview in a new window.
The live editor
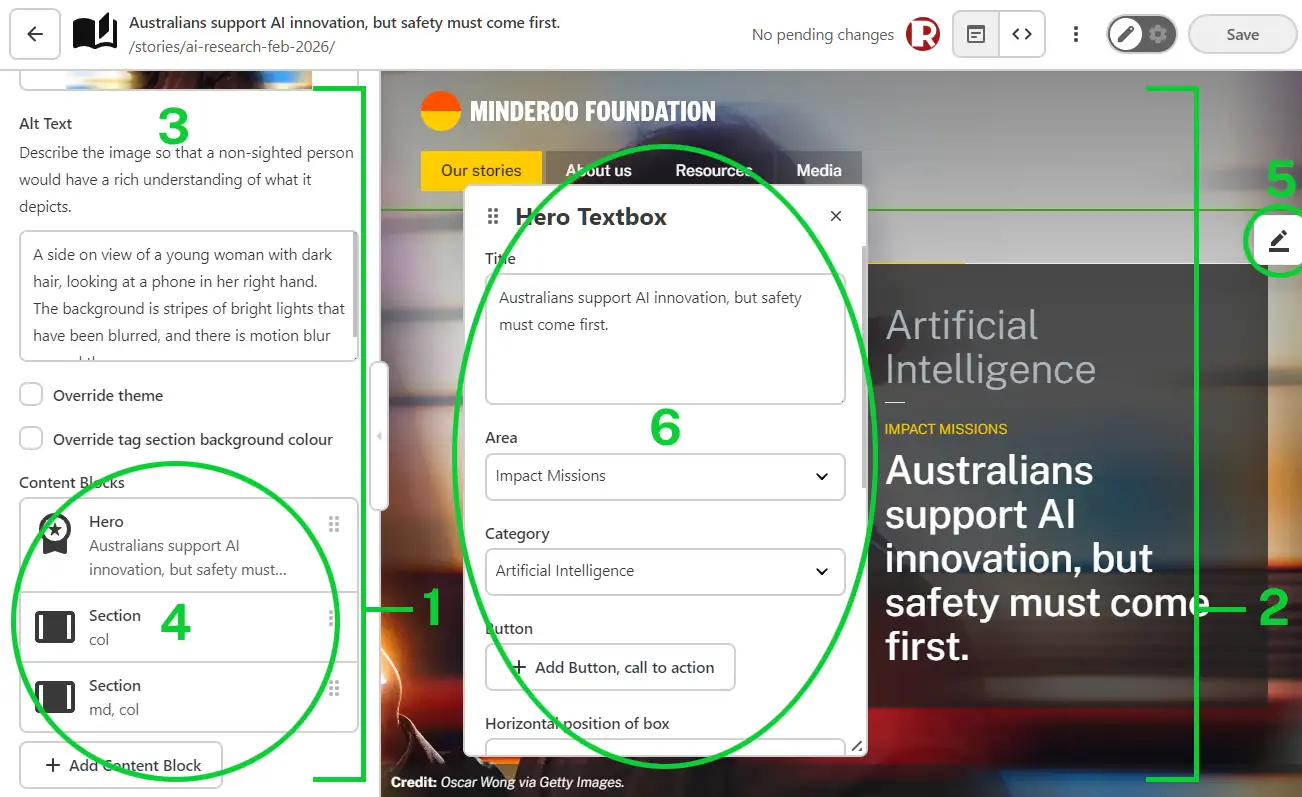
Section titled “The live editor”Most types of content, or collections – e.g. pages, resources, stories – use the live editor as a page builder to allow you to create highly designed pages from a combination of existing blocks.
The page is broken into the left-hand pane (1) which contains all the frontmatter (3) for this content. Frontmatter is like meta data that is used in various places around the site, and most of it compulsory.
The left-hand pane also contains a sliding menu tree view of the blocks on a page. By clicking on cards (4) in this pane, you can navigate through each level of blocks.
The right-hand pane (2) is the live editor itself. You can click directly on blocks in this pane to bring up the edit options for that block, and any blocks it contains.
When you click on the edit icon (5) for a block, the block’s editing popup (6) will appear. Any changes made in this popup will be immediately reflected in the live edit window.
The content editor
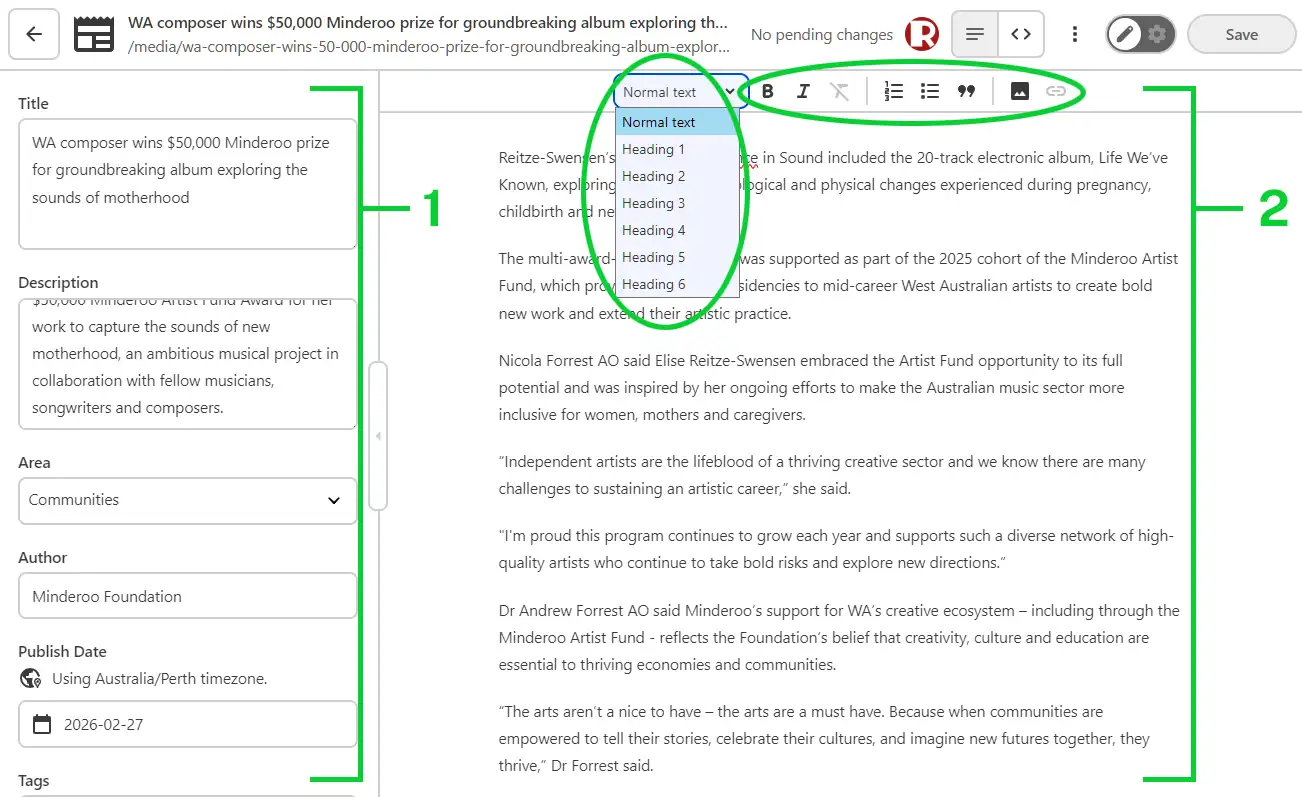
Section titled “The content editor”This is a simplified, WYSIWYG editor for content types that don’t require complex designs, e.g. media releases.
As with the live editor, the left-hand pane (1) contains the frontmatter for this content. The right-hand pane (2) contains the WYSIWYG editor with simple and common styling/content insertion options.